How to Fix "the Disk You Inserted was Not Readable by this Computer" Error Effortlessly
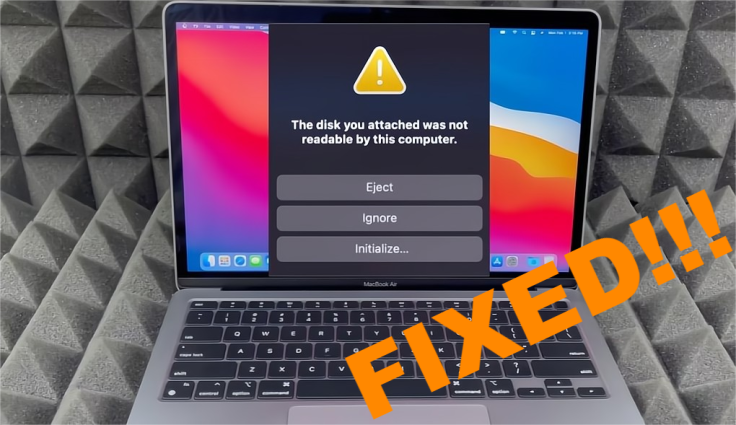
The "Disk not readable Mac" error can be a frustrating issue for many mac users, especially when they need access to essential data. This error message may appear in different variations, such as "The disk you attached was not readable by this computer," "The disk you inserted was not readable by this computer," or similar variant. However, don't worry!
In this guide, we will discuss some easy and effective hacks to fix this common problem. With just a few clicks, your problem will be resolved. So, get an insight into all the possible solutions.
Why Does the "Disk not readable Mac" Error Occur?
When faced with the dread "Disk not readable Mac" error, it is essential to understand the underlying causes to effectively troubleshoot and resolve the problem. Some of the common causes are the following:
The disk or its file system may have become corrupted.
Physical damage to the disk, such as scratches or hardware failure.
The disk is formatted in a file system that macOS doesn't support.
Incorrectly mounting the disk or sudden ejection during data access.
Virus or malware infection.
Outdated drivers or macOS.
Necessary Preparation Before Fixing "The Disk you Inserted was not Readable by this Computer"
The "Disk not readable Mac" error means that the data on the disk cannot be accessed properly. Many Mac users have reported cases where even after attempting to fix this issue, there are still missing or inaccessible files. However, by using reliable data recovery software, they can avoid the risk of permanent data loss.
While there are many options available on the market, Tenorshare 4DDiG stands out with its outstanding success rate and simplicity. The results of this tool are 100% percent satisfactory, and you don't have to learn any skill or expertise to use it. With just 3 easy steps, your data will be received from the external hard drive, USB drive, or Mac System.
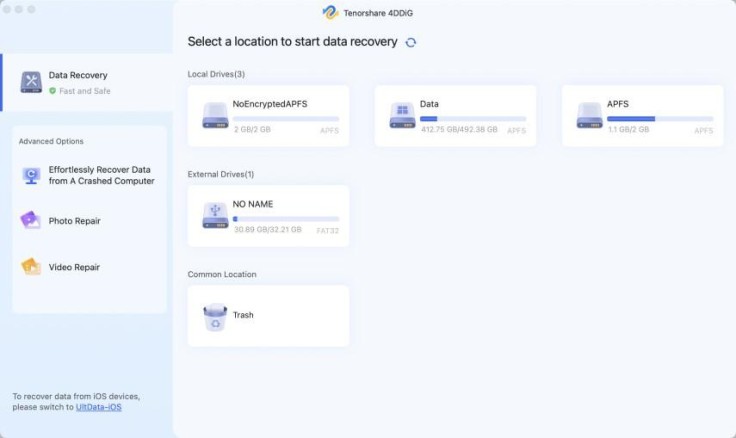
Step 1: Install the software on your Mac and launch the program. Connect your external hard drive to the Computer. Start by selecting the external hard drive from the interface.
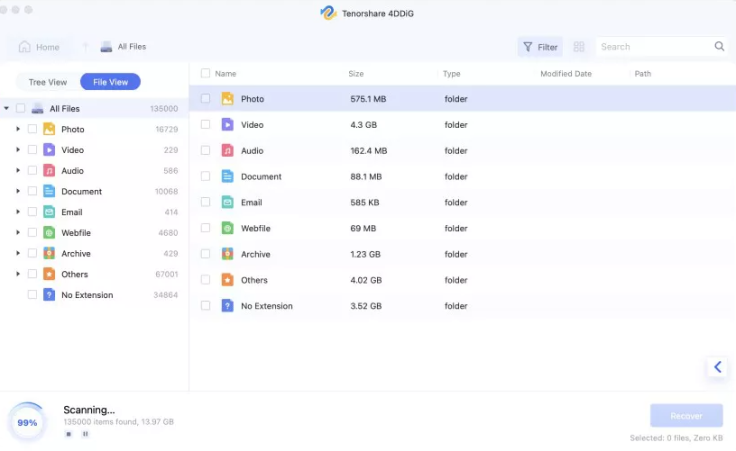
Step 2: Once the scanning result has been generated, you can select each file type to view its contents. Now preview your missing data.
Step 3: Select a file and click the "Recover" icon to choose a location for the recovered files. Saving the files to the partition where they were lost may result in permanent data loss. So, choose a new location.
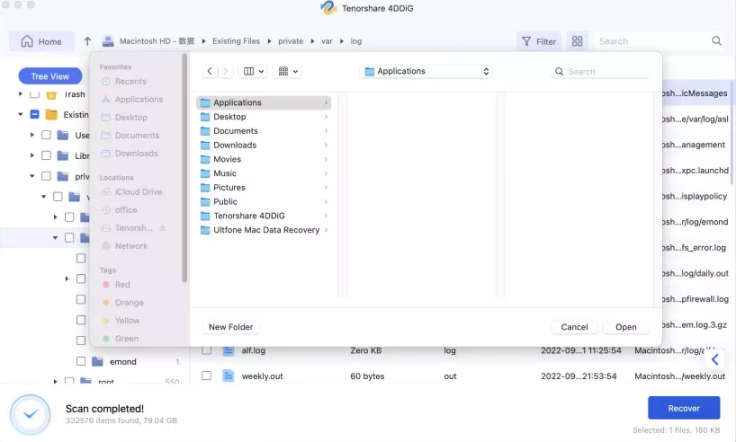
With 4DDiG, you can effortlessly recover lost or inaccessible files due to the "The disk you inserted was not readable by this computer" issue.
How to Fix the Disk you Inserted was not Readable by this Computer?
This error has multiple solutions that you can consider for your Mac. Let's see every fix in detail:
Option 1:Perform Some Basic Checks
In the first step, you can perform some basic checks like restarting your Mac. Yes, you heard it right.
In most cases, this should be able to resolve the "the disk you attached was not readable by this computer" issue.
Check Physical Connections: Ensure that the disk is properly connected to your Mac. Try using a different cable or port to rule out any connectivity issues.
Restart your Mac: Sometimes, a simple restart can resolve minor software glitches that may cause the error.
Try on Another Mac: If possible, connect the disk to another Mac to see if the error persists. This will help determine if the issue is specific to your Mac or the disk itself.
If these basic checks don't work, read on to fix the "Disk not readable Mac" error.
Option 2:Check File System
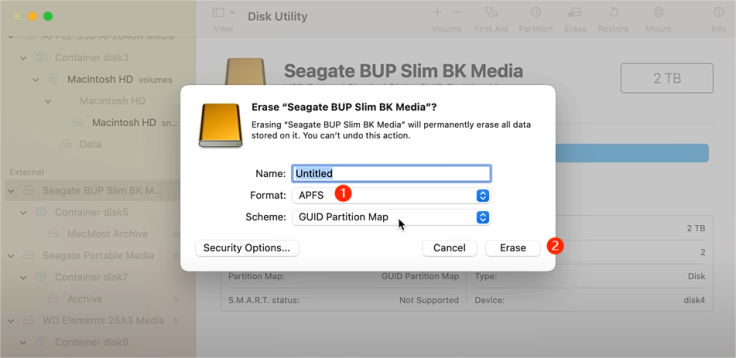
If your USB drive or hard drive has an NTFS format, it's not surprising to see the error message "the disk you attached was not readable by this computer." To change the format, you need to perform the following steps:
Step 1: Connect the device to your mac properly.
Step 2. Go to "Applications" and then "Utilities" for using "Disc Utility."
Step 3: Select your USB flash drive from the sidebar and click "Erase."
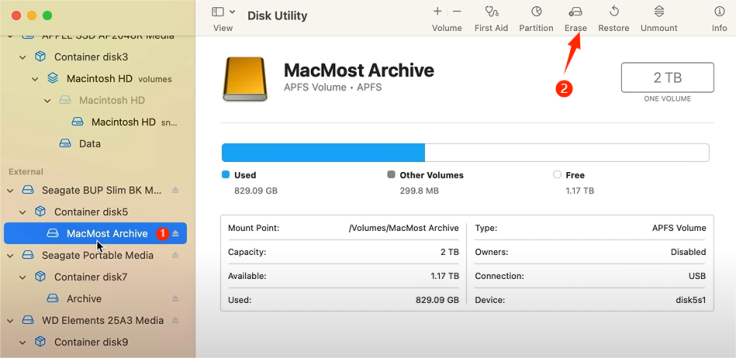
Step 4:If the file system format is incompatible with macOS, reformat the device to a compatible format like APFS or macOS Extended (Journaled).
Option 3.Taking Help from First Aid
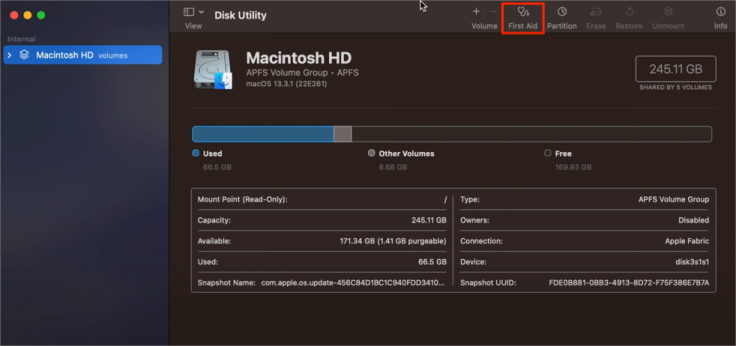
This is another fix to the error "the disk you attached was not readable on Mac" that required a few clicks. With first aid available in Disk Utility, you can fix the "Disk not readable Mac" error due to disk corruption. However, reformatting will erase all data on the device. Ensure you have a backup of any important files or using professional data recovery software like 4DDiG to retrieve your files before proceeding.
Step 1: Open"Disk Utility" using the previous method.
Step 2: Select the problematic disk listed under "External" or "Internal." Then, click on the "First Aid" option.
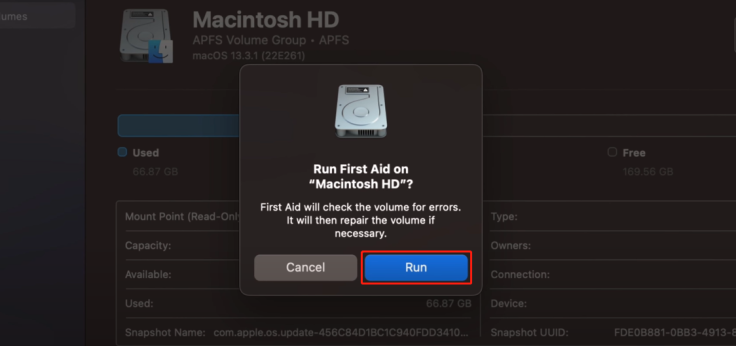
Step 3: Choose the option "Run" to start the process.
Option 4:Reset NVRAM or PRAM on your Mac
Resetting NVRAM or PRAM on your Mac can potentially fix the "Disk not readable Mac error" because both NVRAM and PRAM store certain system settings that can affect the recognition and communication with external disks. Here's how you can do it:
Step 1:Turn on your Mac and immediately press and hold OPTION+COMMAND+P+R.
Step 2.Keep holding these keys until you hear the startup chime again.
Step 3.When you see the Apple logo or the login screen, release the keys.
Option 5.Updating the Drivers and your macOS
Outdated drivers or an operating system is also one of the reasons behind the "Disk not readable Mac" error. So, just by updating the drivers, you can fix it.
Step 1: Select the "Apple Menu" and then a list will appear. Click on the " System Preferences" option.
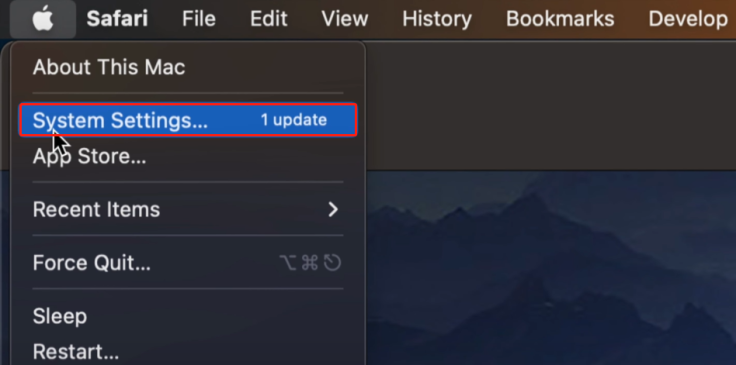
Step 2: Check the pending updates by opening " Software Update."

Step 3: Follow the on-screen instructions to complete the update.
Option 6.Seek Professional Help
If the error message "the disk you inserted was not readable by this computer" continues to appear, and the data on the disk is crucial, it is recommended to seek assistance from professionals. You can reach out to Apple Support through their website or by calling their support hotline. Then, explain the issue you're facing with the disk.
How to Avoid the "Disk not readable Mac" Error in the Future?
There are some safety measures that every Mac user must adopt to avoid the error "the disk you inserted was not readable by this computer." These are the following:
Eject the external hard drive properly.
Regular backup your files to avoid data loss.
File system formats must be up to date to format different external drives easily.
Install any authentic anti-virus software to keep your Mac system free of viruses.
Use the latest MacOS versions and keep updating your software for smooth functioning.
Conclusion
All the methods as mentioned above are enough to solve the "the disk you attached was not readable by this computer" error. Now sharing data from external drives to your Mac book is no more an issue. If you want to be safer in terms of data recovery and storage, then we recommend you go for the 4DDiG Data Recovery software to fix this error. Moreover, don't forget to adopt all the precautions to avoid this error in the future.
FAQs about The Disk You Attached Was Not Readable By This Computer
Q:What happens when you see the "Disk not readable Mac" error?
This means you are unable to access the data available on the external hard drive that you insert into your Mac book. The reasons are multo0lel behind this issue, like un-updated drivers, corrupted file systems, unformatted files, data files, etc.
Q:Why is my USB drive not readable by my Mac?
Your USB may have viruses, so anti-virus software may block it. Other reasons can be unsupported file systems or corrupted interfaces. Even if your USB is physically damaged, then you may face this problem.
Q:Can I recover my data files from an unreadable SD card?
You can recover your files using professional data recovery software like 4DDiG. Launch this tool and select a location where you lost important files. After scanning, choose the required files and click the "Recover" Option to access them again.


