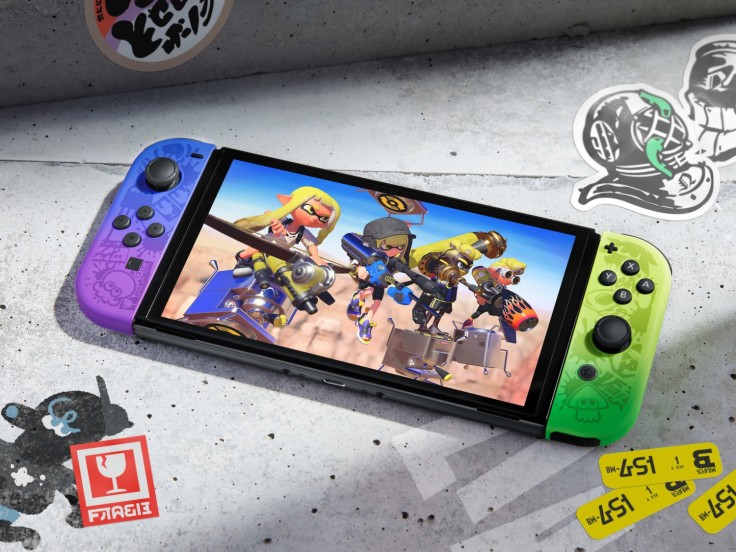
Just recently, Nintendo announced a brand-new Switch OLED with a beautiful coat of paint.

New Splatoon 3 Edition Switch OLED Model
Engadget noted that special-edition Switch models are occasionally released by Nintendo.
Nintendo unveiled the Splatoon 3 Edition Switch OLED model on Wednesday. It is more expensive at $360 than the $350 standard OLED. The OLED version of the Switch is the latest hardware update and has a bigger, brighter screen than the standard Switch, according to CNET.
The gorgeous Joy-Cons on the Nintendo Switch OLED with a Splatoon 3 theme are covered in paint splats and gradient colors. The dock itself is painted a gorgeous shade of cheerful yellow and features all the customary Splatoon-style graphics.
Nintendo Life mentioned that since the Switch OLED's launch in October of last year, this is the first themed version we have seen, and we are currently pretty impressed.
However, Nintendo has also got a new Pro Controller and a Carrying Case to enable you to play Splatoon on the go if you don't fancy a new OLED or Switch.
Here is a closer look at the console, the Pro Controller, and those lovely new Joy-Con.
Let's take a closer look! pic.twitter.com/G15qLKoI5V
— Nintendo of Europe (@NintendoEurope) July 6, 2022
Costs for the Pro Controller and the case are $75 and $25, respectively.
The Switch OLED will go on market for a cool $360 on Aug. 26. The controller and carrying case will go on sale on Sept. 9, the same day that Splatoon 3 arrives.
Read More : Ubisoft Forward to Take Place on July 7 and Sept. 10; Updates for Assassin's Creed Expected
How to Set Up Your New Nintendo Switch OLED
Lifewire listed the steps you should do to set up your new Nintendo Switch OLED. This tutorial will assume that you're a new user.
Either the touchscreen or the Nintendo Switch Joy-Cons can be used to complete the setup process. These instructions assume using the touchscreen.
Press the power button.
Select your preferred language.
Select your Region. Be careful to choose the right region because some games could be region-locked and won't function outside of that region.
You'll see the End-User License Agreement. Select Next after checking the box next to Accept.
The next step is to choose a Wi-Fi network. To skip this step, tap Later. As a result, you won't be able to add a Nintendo network ID when setting up.
Select your time zone.
The choice to connect to a TV is now available to you. This is not required.
You will be prompted to remove the Joy-Cons on the following screen. After doing so, choose Next.
Using the Switch OLED with the Joy-Cons attached or detached while using the kickstand is demonstrated during setup. Click OK to proceed.
The Add User screen will appear.
A new user can be created, or user data from another Switch console can be imported.
Choose a user icon on the following screen.
You will be prompted for a user name.
You'll see an icon and your username on a confirmation screen.
To add your user information, select Link a Nintendo Account; alternatively, press Later to skip.
The Switch Online service of Nintendo will be advertised. If you want to register, choose it. Alternatively, hit Next to proceed.
You can configure Parental Control options on the following screen.
All done! To open Home and end setup, press the Home button on the Joy-Con.


