When a file is deleted on a Mac, it is not immediately removed from the storage drive. Instead, macOS marks the file's space is marked as available for new data. Until that space is overwritten, the deleted file remains recoverable. This is why it's important to act quickly to improve the chances of a successful file recovery on Mac.
In this article, we'll walk you through how to recover deleted files on a MacBook. Also, we'll talk about common reasons for losing files and guide you step-by-step to get them back.
Common Scenarios Leading to File Loss
File loss on Mac can happen for various reasons:
- Accidental Deletion: You delete a file or folder by mistake and empty the Trash before realizing it was important.
- Formatting Disks: Reformatting an external drive or partition without backing up can erase important data.
- System Crashes: A sudden crash or a failed macOS update can corrupt or delete your files.
- Hardware Issues: Problems like a failing hard drive, SSD corruption, or external drive errors can lead to data loss.
- Virus or Malware Attacks: Harmful software can delete, encrypt, or damage your files.
- Unexpected Power Failures: Abrupt shutdowns can cause unsaved work or file corruption.
- User Errors: Accidentally moving files to the wrong place or overwriting them can also lead to file loss.
Each of the above-mentioned scenarios has its own unique challenge, but no matter the reason, recovering lost files is often possible with the right steps and tools.
When Recovery Becomes Difficult
Recovery challenges arise when:
- The Trash Is Emptied: Once emptied, the files are no longer accessible through macOS, requiring third-party tools or backups for recovery.
- Time Elapses: macOS may overwrite the space occupied by deleted files with new data, making recovery impossible.
- File Systems Are Damaged: File system corruption or disk formatting can complicate the recovery process.
- SSD Drives and TRIM Functionality: Modern SSDs with TRIM enabled may automatically erase data blocks marked as free, reducing the likelihood of recovery.
To increase your chances of getting your lost or deleted files back, it's crucial to act quickly, avoid saving new files on the drive, and leverage reliable Mac file recovery software.
By understanding how macOS handles deleted files and the limitations of file recovery, you can take proactive measures to safeguard your data and choose the right tools if required.
Quick Methods to Recover Deleted Files on MacBook
1. Using the Trash Bin to Restore Files
The Trash Bin on your MacBook acts as a backup for files you delete by mistake. Instead of being permanently erased, deleted files are usually sent to the Trash Bin first, giving you a chance to get them back. Let's walk through how you can check the Trash and recover those files:
1. Open the Trash Bin: Locate the Trash icon on your desktop or in the Dock (it resembles a trash can). Click it to view the list of deleted items.

2. Find Your File: Scroll through the items or use the search bar at the top-right corner to look for your deleted file by name.
3. Restore the File: Once you find your file, right-click on it and select "Put Back." The file will return to its original location on your Mac.

Important Tip: Files in the Trash Bin are only kept for a limited time. If you've emptied the Trash or the file has been deleted for too long, you'll need to try the next methods.
2. Recovering Deleted Files from iCloud
If you use iCloud to sync your files, it might still have a copy of your deleted data. Here's how to recover your files using iCloud:
- Log in to iCloud: Open a web browser on your Mac and go to iCloud.com. Log in with your Apple ID and password.
- Access the Files Section: Click on "iCloud Drive" to browse your stored files. Deleted files are often kept in the Recently Deleted folder for up to 30 days.
- Recover Your File: Go to Recently Deleted, find your file, and select it. Now, click the Restore option to save it back to iCloud Drive or download it to your Mac.
Pro Tip: Check your iCloud settings on your Mac by navigating to System Settings > Apple ID > iCloud to ensure file syncing is enabled for apps like Documents and Photos.
3. Accessing Time Machine Backups
Time Machine is Apple's built-in backup tool for macOS. If you've set it up, it can help you recover lost or deleted files easily. Follow these steps:
- Connect Your Backup Drive: If you use an external drive for Time Machine, plug it into your MacBook.
- Open Time Machine: Click on the Time Machine icon in the menu bar at the top-right corner of your screen (it looks like a clock with a circular arrow). Alternatively, go to System Settings > Time Machine and click Enter Time Machine.
- Browse Your Backups: A timeline will appear on the right side of the screen. Use it to navigate to the date when your file was still on your Mac.
- Restore Your File: Find the file you want to recover in the backup. Select the file and click Restore. It will be placed back in its original folder.
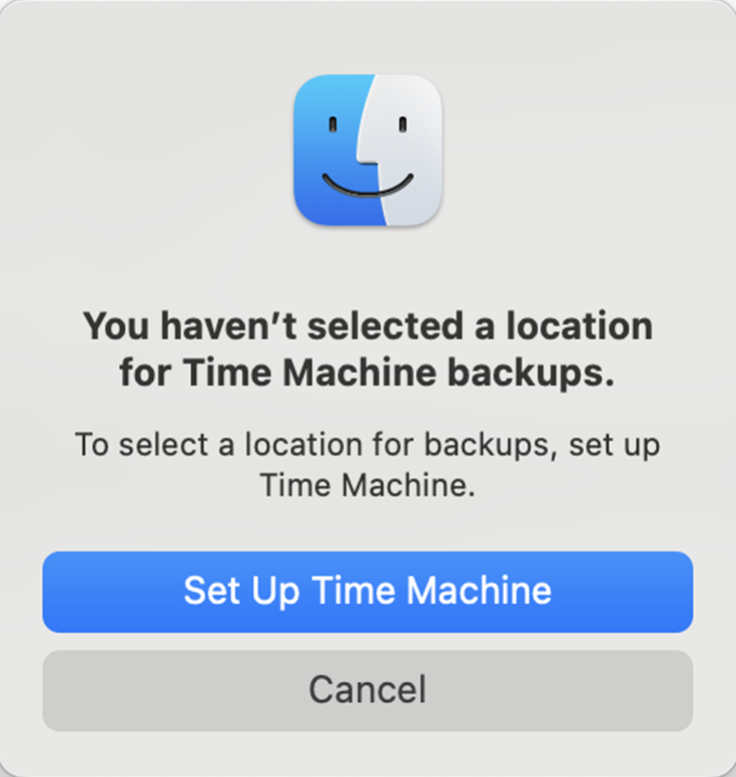
Note: Time Machine needs to be set up so that it can create backups. If you haven't done it yet, it's a good idea to enable it now to keep your data safe from any future mishaps.
These quick methods are your first steps to recover deleted or lost files on your MacBook. Whether you use the Trash Bin, iCloud, or Time Machine, these tools make file recovery simple and efficient.
4. Stellar Data Recovery Software
Stellar Data Recovery is a professional tool that's easy to use and highly effective. Here's how it works:
1. Install and launch the Stellar Data Recovery on your Mac.
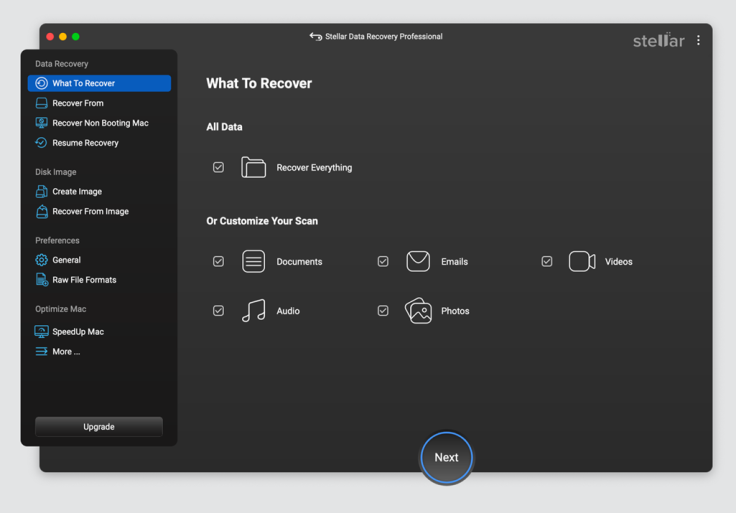
2. Choose the types of files you want to get back (documents, photos, videos, etc.). If you're not sure what kind of file it was, just click on "Recover Everything."
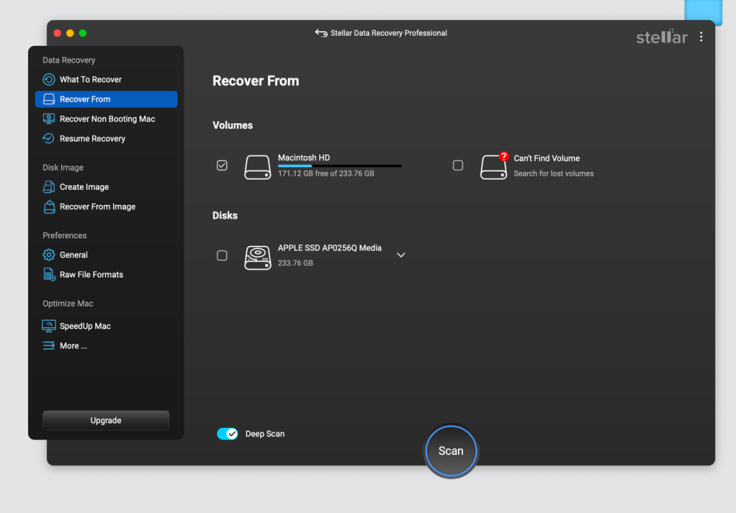
3. Choose the drive or partition where the files were stored and click Scan. Make sure to turn on the 'Deep Scan' toggle button option. It'll give you a thorough scan of the drive and help you find all your files.
4. Now, preview the recoverable files and select the ones you need.
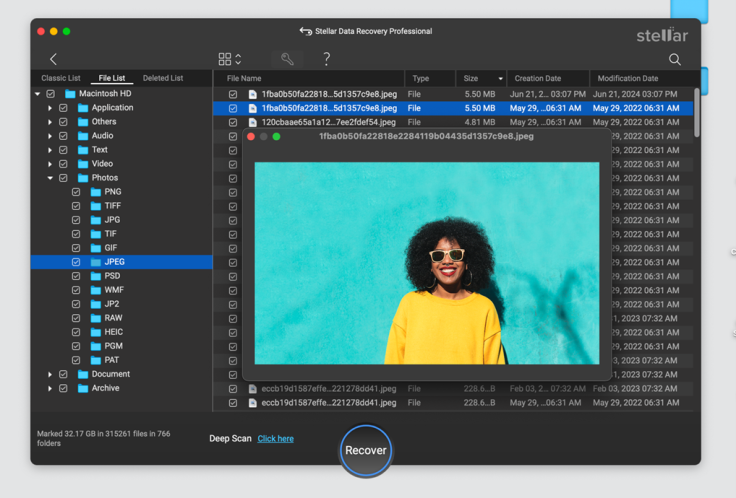
5. Finally, click Recover to restore them to your desired location.
Note: This tool works even if files have been permanently deleted or your drive has been formatted.
Benefits of Using Stellar Data Recovery Software
- Comprehensive Scans: Third-party tools can deeply scan your Mac's hard drive and even external devices for lost files.
- Ease of Use: Many recovery tools, like Stellar Data Recovery, offer intuitive interfaces suitable for beginners.
- Supports Various File Types: Recover anything from documents to photos, videos, and emails.
- Works Without Backups: Unlike built-in macOS tools, professional software doesn't rely on pre-existing backups or snapshots.
- Time-Efficient: These tools often recover files faster than manual methods.
This means that with the help of modern Mac Data Recovery tools, you can easily get back files that you might have accidentally deleted or lost because of a problem with your computer.
Advanced Ways to Recover Lost Files on Mac
macOS Built-In Recovery Tools
Your Mac comes equipped with powerful tools that can help you recover lost files. Here's how to use them:
1. Using macOS Recovery Mode
Recovery Mode is a built-in system that allows you to fix your Mac or recover lost data. To access it:
- Restart your Mac and hold Command (⌘) + R until the Apple logo appears.
- From the macOS Utilities window, choose Restore from Time Machine Backup.
- Follow the on-screen steps to recover your files.
This option works best if you've created backups in advance.
2. Using Terminal Commands for Recovery
For tech-savvy users, Terminal commands can help retrieve deleted files:
- Open Terminal from Applications > Utilities.
- Use commands like ls and cd to navigate to your file location.
- Use cp to copy files from one location to another.
Keep in mind that Terminal requires some understanding of command-line inputs and may not be ideal for beginners.
Best Practices for Preventing File Loss on macOS
Set Up Automatic Backups with Time Machine
One of the simplest and most effective ways to prevent file loss on macOS is by using Time Machine, Apple's built-in backup solution. Time Machine creates regular backups of your entire system so you can recover files even if they are deleted or lost. Here's how to set it up:
1. Connect an External Drive: Plug in an external hard drive or SSD to your Mac.
2. Launch Time Machine: Go to System Settings > Time Machine and click on "Add Backup Disk."
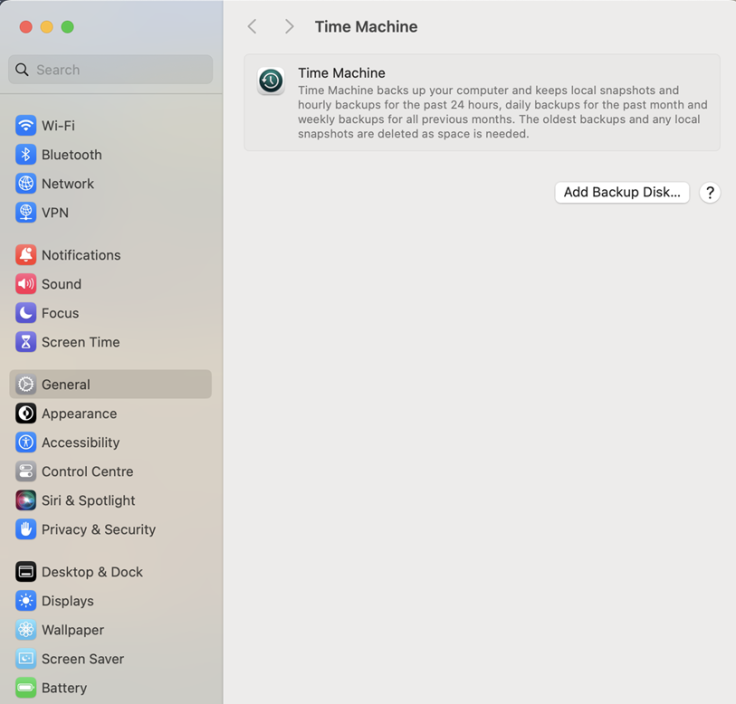
3. Select a Disk: Choose your connected external drive as the backup location.
4. Enable Automatic Backups: Turn on the "Back Up Automatically" option. Time Machine will now create hourly, daily, and weekly backups automatically.
Why Use Time Machine?
- Ease of Use: It's simple to set up and works in the background.
- Version History: You can recover older versions of files you've edited or deleted.
- System Recovery: In case of a major issue, you can restore your entire Mac.
Managing Cloud Storage Solutions Effectively
Cloud storage services like iCloud, Google Drive, and Dropbox are fantastic for keeping your files accessible and safe. However, to prevent file loss, you need to manage them effectively. Here's how:
1. Enable iCloud Drive
- Go to System Settings > Apple ID > iCloud and toggle on "iCloud Drive."
- Store important files in your iCloud Drive folder to ensure they're automatically synced across devices.
2. Organize Your Files
- Create folders for different categories like work, photos, and personal documents.
- Regularly review and clean up your files to avoid confusion.
3. Sync Across Devices
- Enable syncing options to ensure your files are updated on all your devices. For example, with Google Drive, install the app on both your Mac and smartphone for seamless file access.
4. Monitor Storage Limits
- Keep an eye on your cloud storage limits to avoid issues. Upgrade your plan if needed to prevent files from not syncing due to lack of space.
Benefits of Cloud Storage
- Accessibility: Access your files anytime, anywhere.
- Automatic Backup: Changes to files are saved in real time.
- Collaboration: Share files easily with others.
Avoiding Unintentional File Deletion
Accidentally deleting files happens to the best of us. But with a few precautions, you can minimize the risk:
1. Use the Trash Safely
Files you delete aren't immediately erased; they go to the Trash. Before emptying the Trash, double-check its contents to ensure you're not losing something important.
2. Enable File Confirmation
Turn on the setting that asks for confirmation before deleting files. This extra step can save you from mistakes.
To do this, open Finder, go to Settings > Advanced, and check "Show warning before emptying Trash."
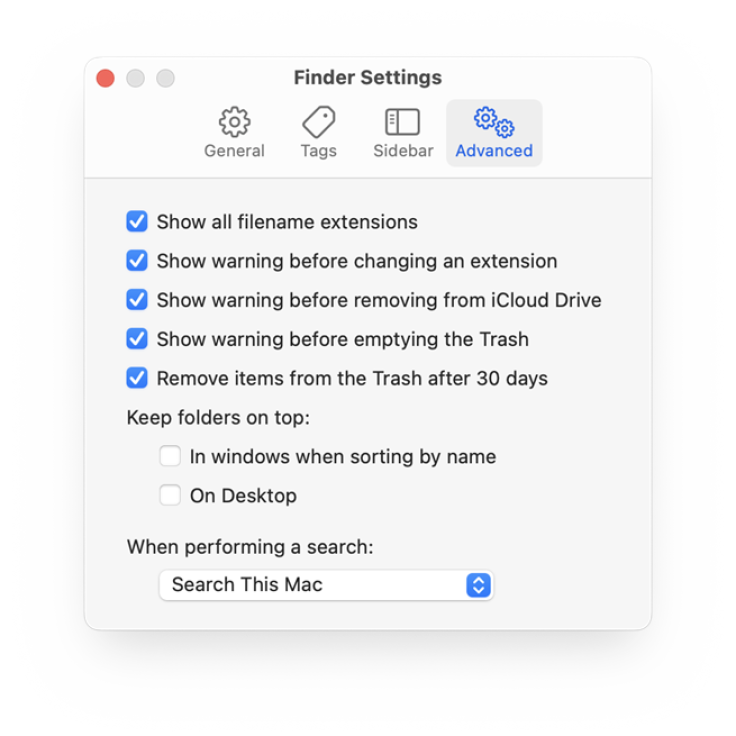
Now, whenever you try to empty the Trash, the warning will pop up.

3. Create a Habit of Backing Up
Regularly back up important files manually if you're not using Time Machine. Copy them to an external drive or cloud storage.
4. Use File Recovery Software
If you do accidentally delete a file, tools like Stellar Data Recovery can help you recover it. Make sure to act quickly, as the chances of recovery decrease over time.
Conclusion: Act Quickly to Recover Your Files
Losing important files on your Mac can feel scary, but don't panic; the sooner you take action, the better your chances of getting your files back. Macs have built-in tools like the Trash folder and Time Machine that can help you recover lost data. If those don't work, using a trusted Mac Data Recovery tool can make things much easier.
Moving ahead Once you've recovered your files, it's important to protect them for the future. Make it a habit to back up your Mac regularly using tools like Time Machine or cloud storage options like iCloud or Google Drive.


